Rifle Cleaning and Maintenance
By SSG William T. Pace, USAMU Service Rifle Team Member
This article will cover one of the many reliable techniques to clean your rifle. The two main reasons we clean our rifles are to maintain consistency in accuracy and to help prevent any possible malfunctions. The cleaning of your rifle can be broken down into four steps: cleaning the barrel, cleaning the chamber, cleaning the bolt, and cleaning the lower receiver.
Cleaning the Barrel
The first thing to consider before cleaning your barrel is your cleaning rod. It is best to use a one piece, coated rod. If you have a sectional rod, I would advise you to get rid of it, as it may scratch the bore. Always use a bore guide when you clean your barrel. This is crucial because it provides proper alignment for the rod and allows you to clean the barrel from the chamber end out, rather than from the muzzle end. It also provides protection for the chamber, throat, rifling and crown.
|
|
|
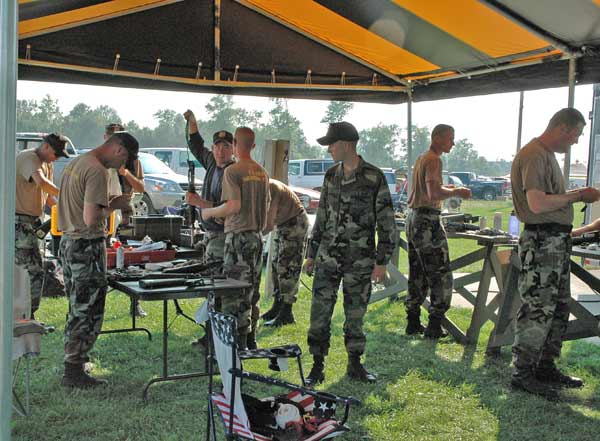
Members of the USAMU Service Rifle Team clean their rifles to maintain consistency in accuracy and to help prevent any possible malfunctions. |
Start by soaking a patch with a good carbon cutter. (In this article I’m going to use Hoppes #9 as my example. While product names are used, other products are available and the Army is not a compensated endorser of any of the stated products.) Once you have soaked the patch, run it through the barrel and repeat that process three times. All of us on the Army Service Rifle Team use a pointed jag with Pro Shot patches; it’s a very good combination. Brushing the barrel is the next step. Use a copper or nylon brush; do not use a steel brush because it will scratch the barrel. Brush the barrel 10-12 times. Then run two wet patches followed by one dry patch down the barrel.
Now move to a copper removal solvent (In this article I’m going to use Sweets as my example.) Soak a patch with Sweets and run it through the barrel, let it soak for 3-5 minutes. If you are using Sweets, do not let it soak for more than ten minutes! After you have let it soak you can either continue to run wet patches down the barrel until the patches come out fairly clean or brush the barrel with the Sweets. If you do decide to brush the barrel with Sweets, be sure to use a nylon brush. Sweets will eat the copper bristles off of a copper brush rendering it worthless after one cleaning. Which ever method you choose, you need to neutralize the Sweets. You can do this by rodding your barrel with a patch wet with Hoppes, followed by a dry patch. Continue that process until the patches come out clean. Cleaning the crown is the final part of cleaning the barrel. To clean the crown, use a Q-tip soaked in Hoppes followed by a dry one. Repeat that sequence until the crown appears clean.
Cleaning the Chamber
Begin cleaning the chamber using a chamber rod and chamber brush. Take a 30 cal or 7.62 patch and tightly wrap it around the chamber brush. Soak the patch with Hoppes and run it into the chamber, repeating that process three times. Next, dry it out using two dry patches. If you have a lug recess cleaning head, use it after the two dry patches on the chamber brush. Apply the same technique of one Hoppes soaked cotton swab, followed by one dry cotton swab, and repeat that twice. If you do not have a lug recess cleaning head, the 30 cal. patch wrapped around the chamber brush works fine. Once the chamber is clean and dried out, use a rag and a little Hoppes to wipe out the inside of the upper receiver. With the inside of the upper receiver and chamber clean, insert the bore guide and run one more dry patch through the barrel. The reason for this is that some of the solvent may leak into the rifling while cleaning the chamber.
Cleaning the Bolt
Cleaning the bolt is the easiest process. A rag and a little Hoppes works fine for cleaning the outside of the bolt carrier. Clean the inside of the bolt carrier applying the same technique used to clean the chamber. With the bolt disassembled, clean the inside of the bolt body, using Hoppes and Q-tips. Be sure to dry it out once it is clean. The outside of the bolt can be cleaned with a rag and some Hoppes. If there is significant amounts of carbon build up on the outside of the bolt near the rings, you can use a razor blade or small knife as a scrapping tool to break it loose. Another option is to take an old chamber brush or an old bore brush soaked in Hoppes and brush it over the carbon build up to break it loose. Once the carbon is broken free, simply use a rag to wipe it clean. If you seem to have a lot of carbon build up after firing a match, you might consider either using a different lubricant or lubricating your bolt more frequently. If you use a good lubricant and re-lubricate your bolt every 20-30 shots during the match, it will help the rifle function correctly and make cleaning a lot easier.
Cleaning the Lower Receiver
The lower receiver is also a very simple process. Use a rag to wipe off everything that you can and use Q-tips for the hard to reach spots. You can also use Gun Scrubber, Does It All, or any one of these types of aerosol cleaning agents for the lower receiver and trigger mechanism. It is not necessary, however, to use these products for every cleaning. Some prefer to use it only after every 500 rounds or so. If you do use these products to clean the trigger, be sure to re-grease and lubricate the trigger mechanism after each application.
I hope that you are now familiar with the tools and techniques used to clean your barrel, chamber, bolt and lower receiver. Whether you follow the exact process outlined in this article, or you create your own routine, it is very important that you clean your rifle the same way, every time. Cleaning the rifle with a consistent technique will help you to be aware of any changes in your rifle and to insure that none of these steps is neglected.
When you clean and properly maintain your rifle your chances of “cleaning the target” greatly increase.