
Standing and Trigger Control
By SGT Brandon Green, USAMU Service Rifle Team Member
|
|
We’ve all been there—on the two hundred yard line and in our three-minute prep period. As you stand there looking through your sights, you just can’t seem to make them stay in the center of your target or even close for that matter. You know that your three minutes are running out quickly, so what are you going to do? This is the time when a lot of shooters start to come unraveled. We all know that nothing I tell you here will make you stand up there and shoot center shots all day, but maybe I can bring a few things to light that will help you control the movement and work through times like this. On days when your standing just doesn’t seem to settle, we need to be able to quickly evaluate and, if necessary, rebuild our position to help control the movement. We all know how to stand up, but it’s the standing still part that gives us trouble most of the time.
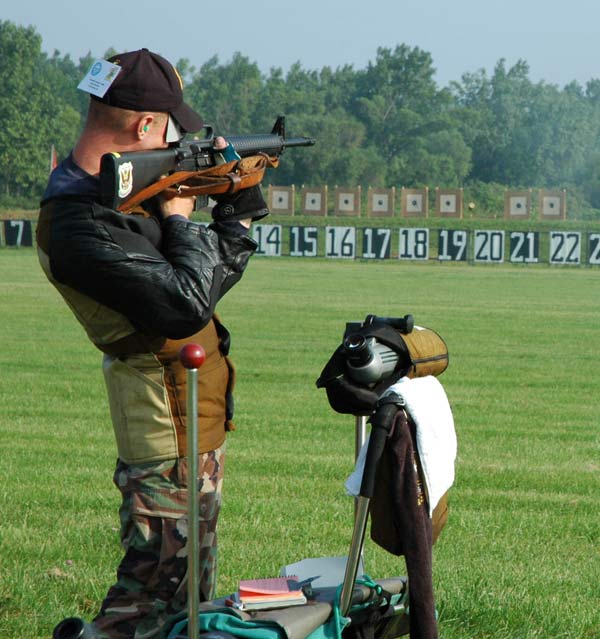
We will start our position rebuild at the feet. You normally want your feet about shoulder width apart and perpendicular to the target. Some shooters like to keep their weight evenly distributed between the heels and balls of their feet, but this may not be the best position for you. I normally try to find a place on the firing line where my toes are just slightly higher than my heels, maybe a 1/4 to 1/2 inch higher. With my toes slightly higher, I feel a little more of the pressure on the balls of my feet. This usually helps me eliminate some of the back and forth movement in my position by inducing a little tension in my calf muscles.
At this point I will check for excess tension in other parts of my legs. I notice that excess tension in my upper legs can also cause me to sway back and forth more than usual. By rotating each foot in or out, I can usually find a position that will eliminate this excess tension and help my legs feel more relaxed. I then check the tension in my knees. I don’t shoot with my knees locked, but they aren’t exactly bent either. I find where they are comfortable and stick with it. Now that my legs are at a good starting point, I move up to my hips and waist.
I normally shoot with my hips perpendicular to the target and twist at the waist slightly. This is more of an international style rifle position than a traditional highpower position, but it is very comfortable and relaxed for me. With my waist only slightly twisted, I can rest my forward arm almost directly on my hip bone instead of bringing it around and resting it on my ribs.
|
|
|
Place the butt stock into your shoulder where you can achieve an optimum head position. Generally, the butt is placed higher in the shoulder for the standing position than other positions. |
In order to center the weight of the rifle over my body, I shoot with a good bit of back bend in my position. This helps keep my head more upright and keeps me from getting too much of the back and forth movement that I talked about earlier. I have also tried eliminating the backbend and trying to stand more upright the way some of the other shooters on our team stand, but I find that I start to lean forward as soon as I relax.
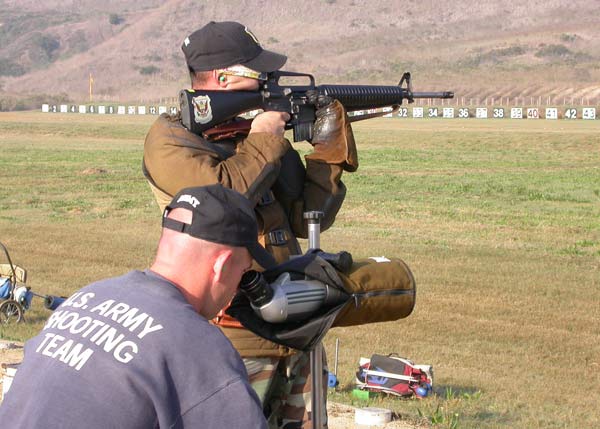
I try to pay very close attention to my shoulders and arms, because if I have very much tension in them, I am almost always farther outside of my calls than I should be. The rifle is placed high in my shoulder so that my head is upright and I’m not bending over to look through the sights. Because the butt of the rifle is so high in my shoulder, I have to position my forward hand in a way that gets the front of the rifle up to the target, instead of doing this by lowering the butt of the rifle in my shoulder.
|
|
|
Your non-firing hand is the platform on which the rifle lies. Your hand position will control the height, or elevation, of your position. |
My non-firing hand position includes the sling in its grasp underneath the hand guard of the rifle. This helps me get the front of the rifle up to where I want it. I try to grip the hand guard only enough to keep my hand from moving under the rifle. I also try to pay close attention to not gripping so hard that I create tension in my forward arm.
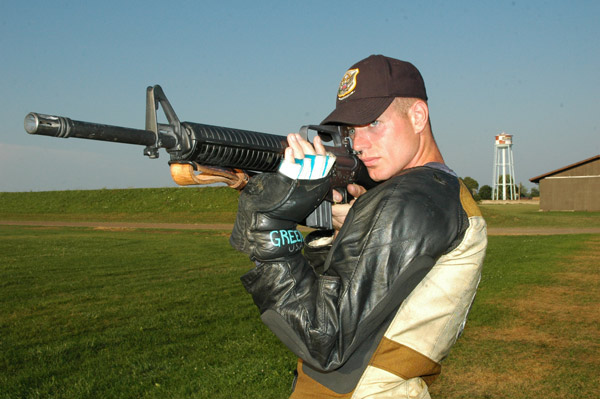
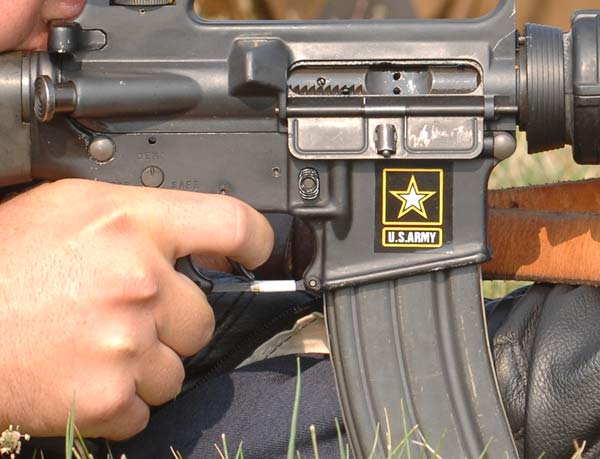
I place my firing hand high on the pistol grip and use a firm grip to hold the rifle in place. This firm grip pressure also helps me be aggressive on the trigger without moving the rifle when I break the shot. The position of my firing hand allows my trigger finger to fall naturally on the trigger, which for me, places the trigger in the crease of the first joint of my finger. You want to pay attention to your firing-hand grip to ensure that you are not applying torque to the rifle when you try to move the trigger straight to the rear.
|
|
|
In order to get the head pressure to acquire and keep good sight alignment, place your chin on the top of the stock and drag it down until your eyes are behind the rear sight. |
Next I position my head on the stock of the rifle by using a technique we call dragging skin. I start by placing my chin on the top of the stock and dragging it down until my eye is behind the rear sight. Using this technique allows you to pull up all of the excess skin from under your cheek and helps you get the head pressure you need to acquire and keep good sight alignment. Without good head pressure, the rifle will move under your head during recoil. When the rifle does this, you will loose the sight alignment you worked so hard to achieve and it will be very difficult to call your shots. It is very important to check your head position and sight alignment every single shot! You want to be consistent with your head position and the pressure you put on the stock of the rifle. The best way to work on getting a good head position is by doing lots of standing dry fire practice, either at the range or at home. Find a position that allows you to look directly through the center of your rear sight without having to stretch your neck too much.
When you are dry firing, pay attention to your follow through. You want to be sure you aren’t jumping off of the rifle as soon as you break the shot. It is much easier to catch yourself doing this when you are dry firing than when you have the recoil of the rifle to hide it.
|
|
|
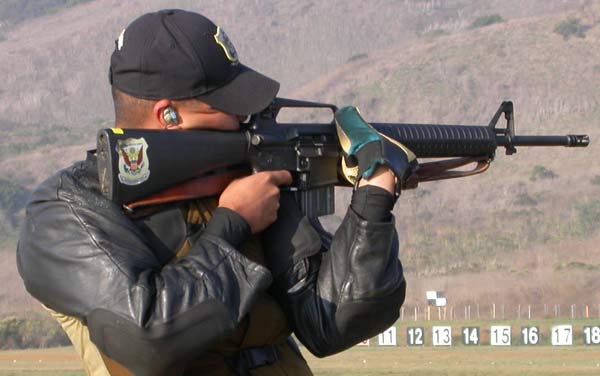
Being aggressive on the trigger means putting initial pressure on the trigger before you get into your hold and then breaking the shot when you want to. |
This brings us to the subject of trigger control. Trigger control is simply the manner in which you move the trigger to the rear to fire the rifle. There are many different ways to move the trigger to the rear, but the key to all of them is being SMOOTH. Most match grade service rifles use a two-stage trigger set at four and a half pounds. The two-stage trigger allows you to take up around two pounds of this weight with the first stage and will break cleanly as you add the other two and a half pounds of pressure. With these triggers I like to use a fairly aggressive trigger control. Of course, the firm grip pressure I use helps me do that. I take up the first stage of the trigger as soon as I get my head positioned on the stock and I usually take three breaths before I exhale and let the sights settle on the target. With the aggressive trigger control I use, I apply the pressure to break the shot as soon as it starts to settle. If I’m having more movement than usual, I try to break the shot as it starts to come into the nine ring. Breaking the shot on the move is tricky sometimes, and you would much rather break it on the way in than on the way out. If you break a shot on the move as it passes through the black, you will most certainly be outside of call. We call this being “behind on the trigger”. When you break a shot as it starts to come onto the target, you are more likely to hit closer to center than you would if you were behind on the trigger. Some people choose to take the first and second stages of the trigger all at once and this will work as long as you are smooth on the trigger. I’ve personally never been able to use this type of trigger control because I tend to pull the trigger way too fast and hard. Whichever type of trigger control you use, it is usually better to be a little aggressive. Being aggressive will usually help you break the shots as soon as they get close to center.
Now that I have told you how I rebuild my position, it is time for you to go out and work on yours. Remember the key points I have discussed, take good notes and good luck.
|
The USAMU Service Rifle Team is also answering your questions pertaining to Service Rifle Shooting including topics such as Equipment and Ammunition, Shooting Positions and Shooting Techniques and Tactics. Go to http://www.odcmp.com/Competitions/USAMU/ShootingTips.htm to view the latest questions and answers. If you have a question you would like to ask, email USAMU@odcmp.com. |