
No-Wind Zero and Marking Your Sights
By SFC Jason St. John, USAMU Service Rifle Team Member
There is no question about it, to consistently hit the X-ring you need accurate elevation and windage zeros. These zeros change as you increase distance, and may possibly change as you gain experience. These changes are apparent in a well kept Data Book. To calculate your zeros, starting points are needed. You can establish starting points for your service rifle sights by marking them to give you a reference point for calculating your zeros.
After you establish your elevation zero, mark your elevation wheel. You will then be ready to zero your rifle for any given distance.
The first point you need to establish is your elevation zero. When marking your elevation starting point, bottom out your elevation wheel and count up 2 ˝ Minutes of Angle (MOA). Coming up 2 ˝ MOA allows room to adjust your zero. You do not want your zero to be at the bottom of the elevation wheel. Distinctively mark your elevation wheel using finger nail polish, a paint pen or something similar so this mark will not easily rub off. After your sights are marked you will be ready to zero your rifle for any given distance.
Now that you have a windage starting point you need to establish a no-wind zero that will keep shots consistently in the middle of the target. A no-wind zero is a sight setting that allows you to hit the center of the target in a no-wind condition, and is best determined at close range. Once you are confident you have a no-wind zero, count the clicks back to your windage starting point and record this information in your Data Book. If you do not have an accurate no-wind zero, your windage corrections will be off. With a correct no-wind zero you can be ready for any wind conditions.
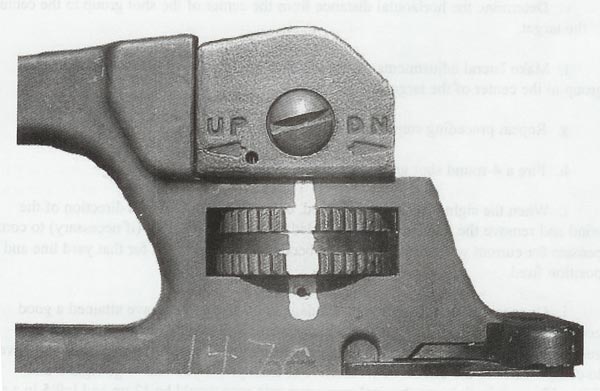
When establishing your elevation zero, make initial elevation adjustments using the front sight post. Once your shots are in the black, fine tune your zero with your elevation wheel. Once you have determined your zero, count the clicks back to the mark on your elevation wheel, and record this number in your Data Book. This will serve as your first yard line zero.
The next mark you should make on your sights is on the windage knob. Begin by centering your rear aperture. Do this by counting how many clicks it takes to move your sights completely from the left to right. Once you have this number move the sights to the center by counting halfway back. You may also be able to center your sights by using the tick marks that are on the sight and rear aperture. It is recommended that you do the latter, if possible. When you are centered, mark the center point on your windage knob and the rear sight housing as you did for elevation. This will give you a starting point to return to.
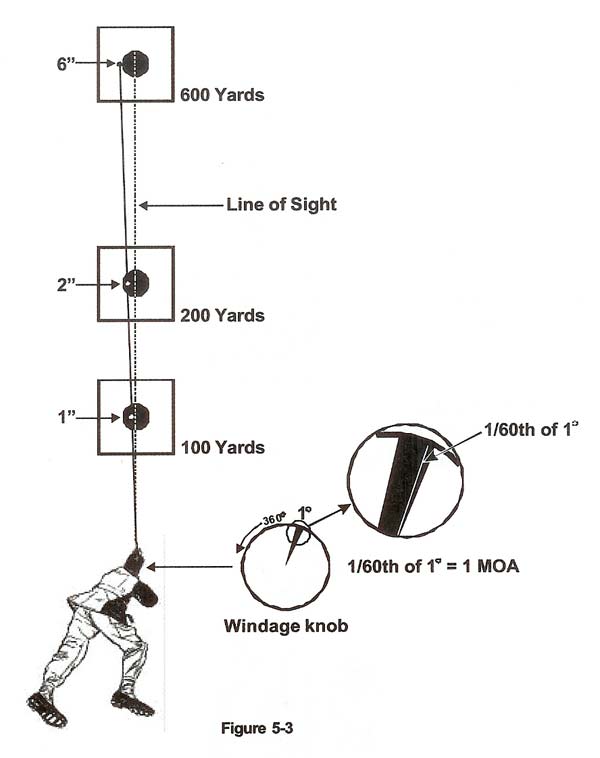
When shooting in a windy condition you must determine the distance that the bullet would be blown, and zero the rifle by applying this difference to the rifle sight. For example, if you determine the wind will move the bullet three minutes to the right then the zero needs to be offset three minutes to the right.
By having zero starting points and refined zeros you should be able to significantly improve your scores. Through practice where you constantly strive to move your groups to the center you will be able to achieve the consistency in keeping your shot groups centered that is needed to be a champion. Good shooting and good luck!